Create an Elastic Network Interface (ENI)
Why do we need an additional ENI?
There are 2 things we must ensure when the NAT instance crashes or is terminated (accidentally or intentionally):
- The NAT instance must be replaced automatically by another one. This will be achieved by setting up an Auto-Scaling Group in the next step.
- The private route tables still point correctly to the new NAT instance. To achieve this requirement, one of the easiest ways is to create an Elastic Network Interface (ENI). This ENI will be attached to the NAT instance when it launches and all traffic to the internet from the private instances will go through this ENI. If the NAT instance crashes or is terminated, the ENI will be detached from the old instance and attached to the new instance automatically. Therefore, the private instances will not be affected by the change.
Create the ENI
-
Open the EC2 console (opens in a new tab).
-
In the sidebar, choose Network Interfaces.
-
Choose Create network interface.
-
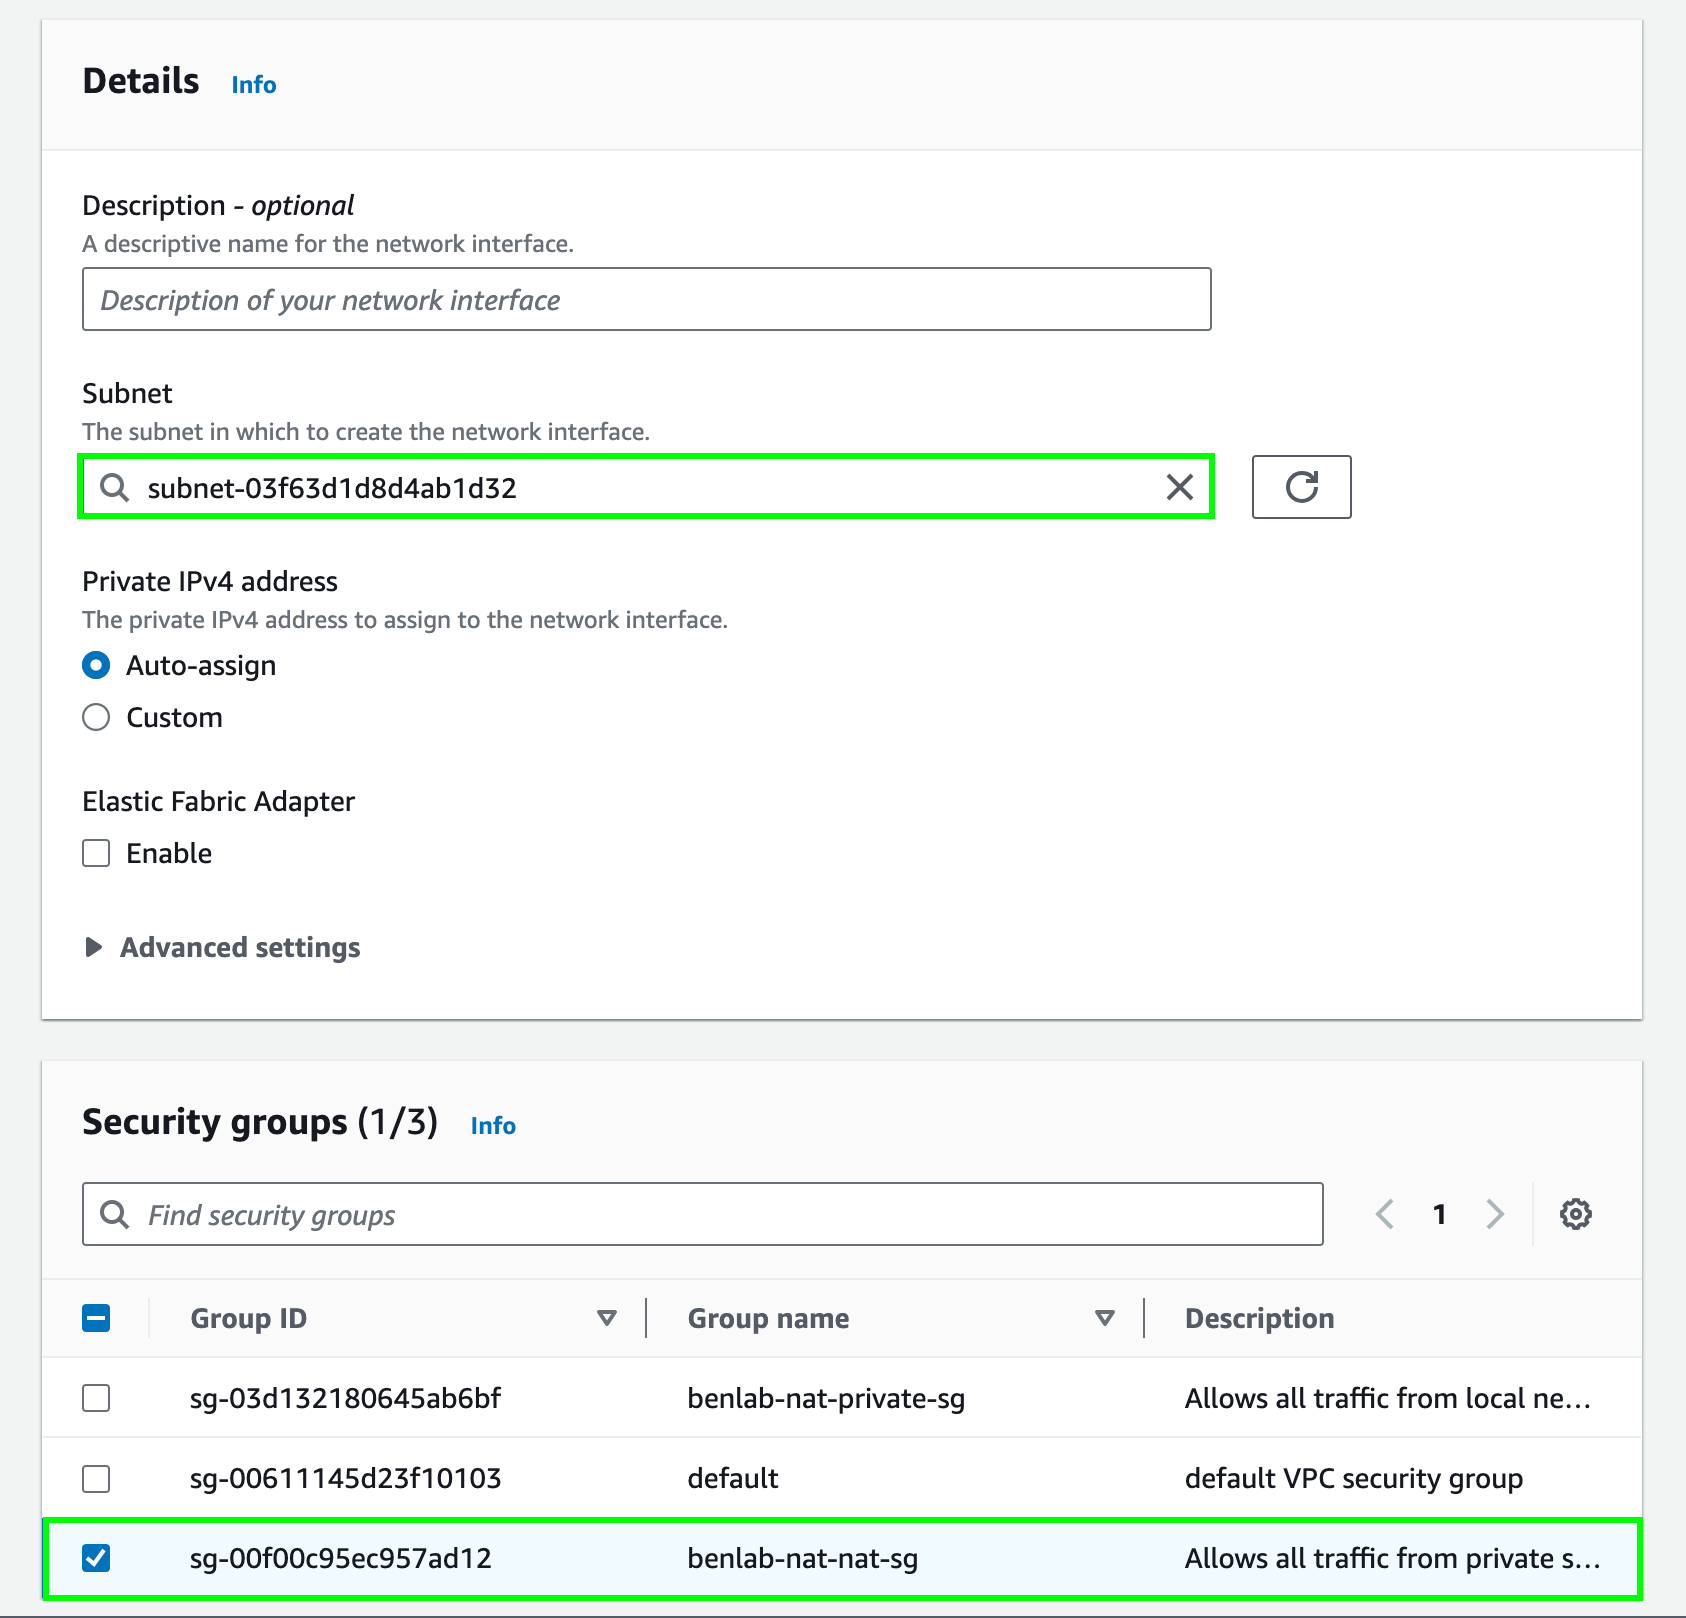
In the Create network interface wizard, enter the following information:
-
Subnet: Choose a public subnet you created earlier where the NAT instance will be launched.
-
Private IP address: Leave it
Auto-assign. -
Security groups: Choose the security group you created earlier for the NAT instance.

-
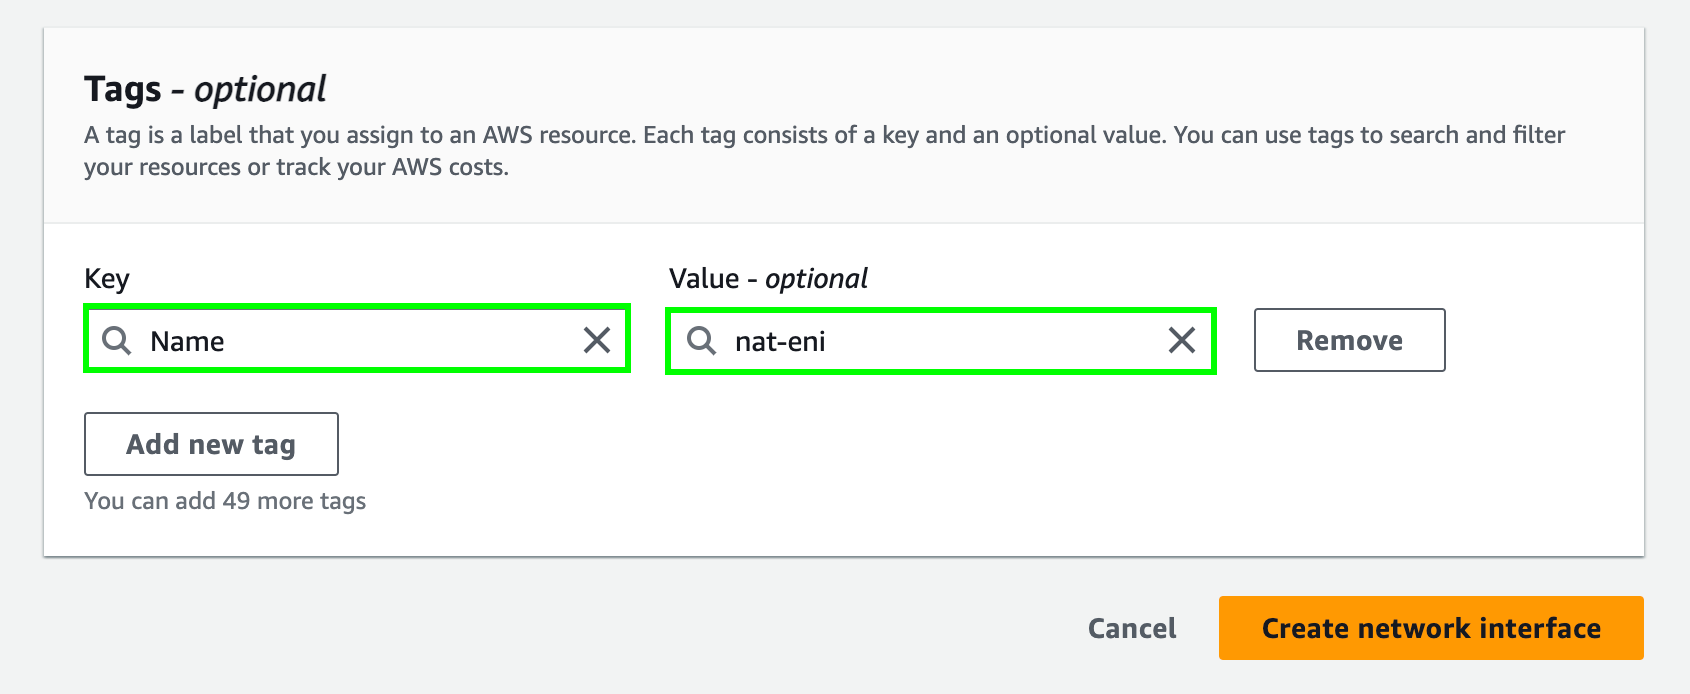
Tags: Add a tag with the key
Nameand valuenat-eni. This tag will be used to identify the ENI later. So make sure to use the same key and value.
-
-
Choose Create network interface.
In many real-world cases, keeping the NAT instance's public IP address static is important. For example, if you integrate with a third-party service that requires a fixed IP address, you can use an Elastic IP address (EIP) and associate it with the ENI. However, for this lab, we will not implement this feature to keep the workshop simple and cost-effective.