Create IAM Role for the NAT Instance
The NAT instance will have to perform the following actions in its launch process:
- Disable the Source/destination check, which is enabled by default for EC2 instances. If not, the NAT instance will drop the traffic that is not coming from or going to itself.
- Attach the ENI. The NAT instance will use this ENI to forward traffic from the private instances to the internet and vice versa.
Therefore, we need to create an IAM role and attach it to the NAT instance later. This IAM role allows the NAT instance to perform the actions mentioned above.
-
Open the IAM console (opens in a new tab).
-
In the sidebar, choose Roles.
-
Choose Create role.
-
Choose
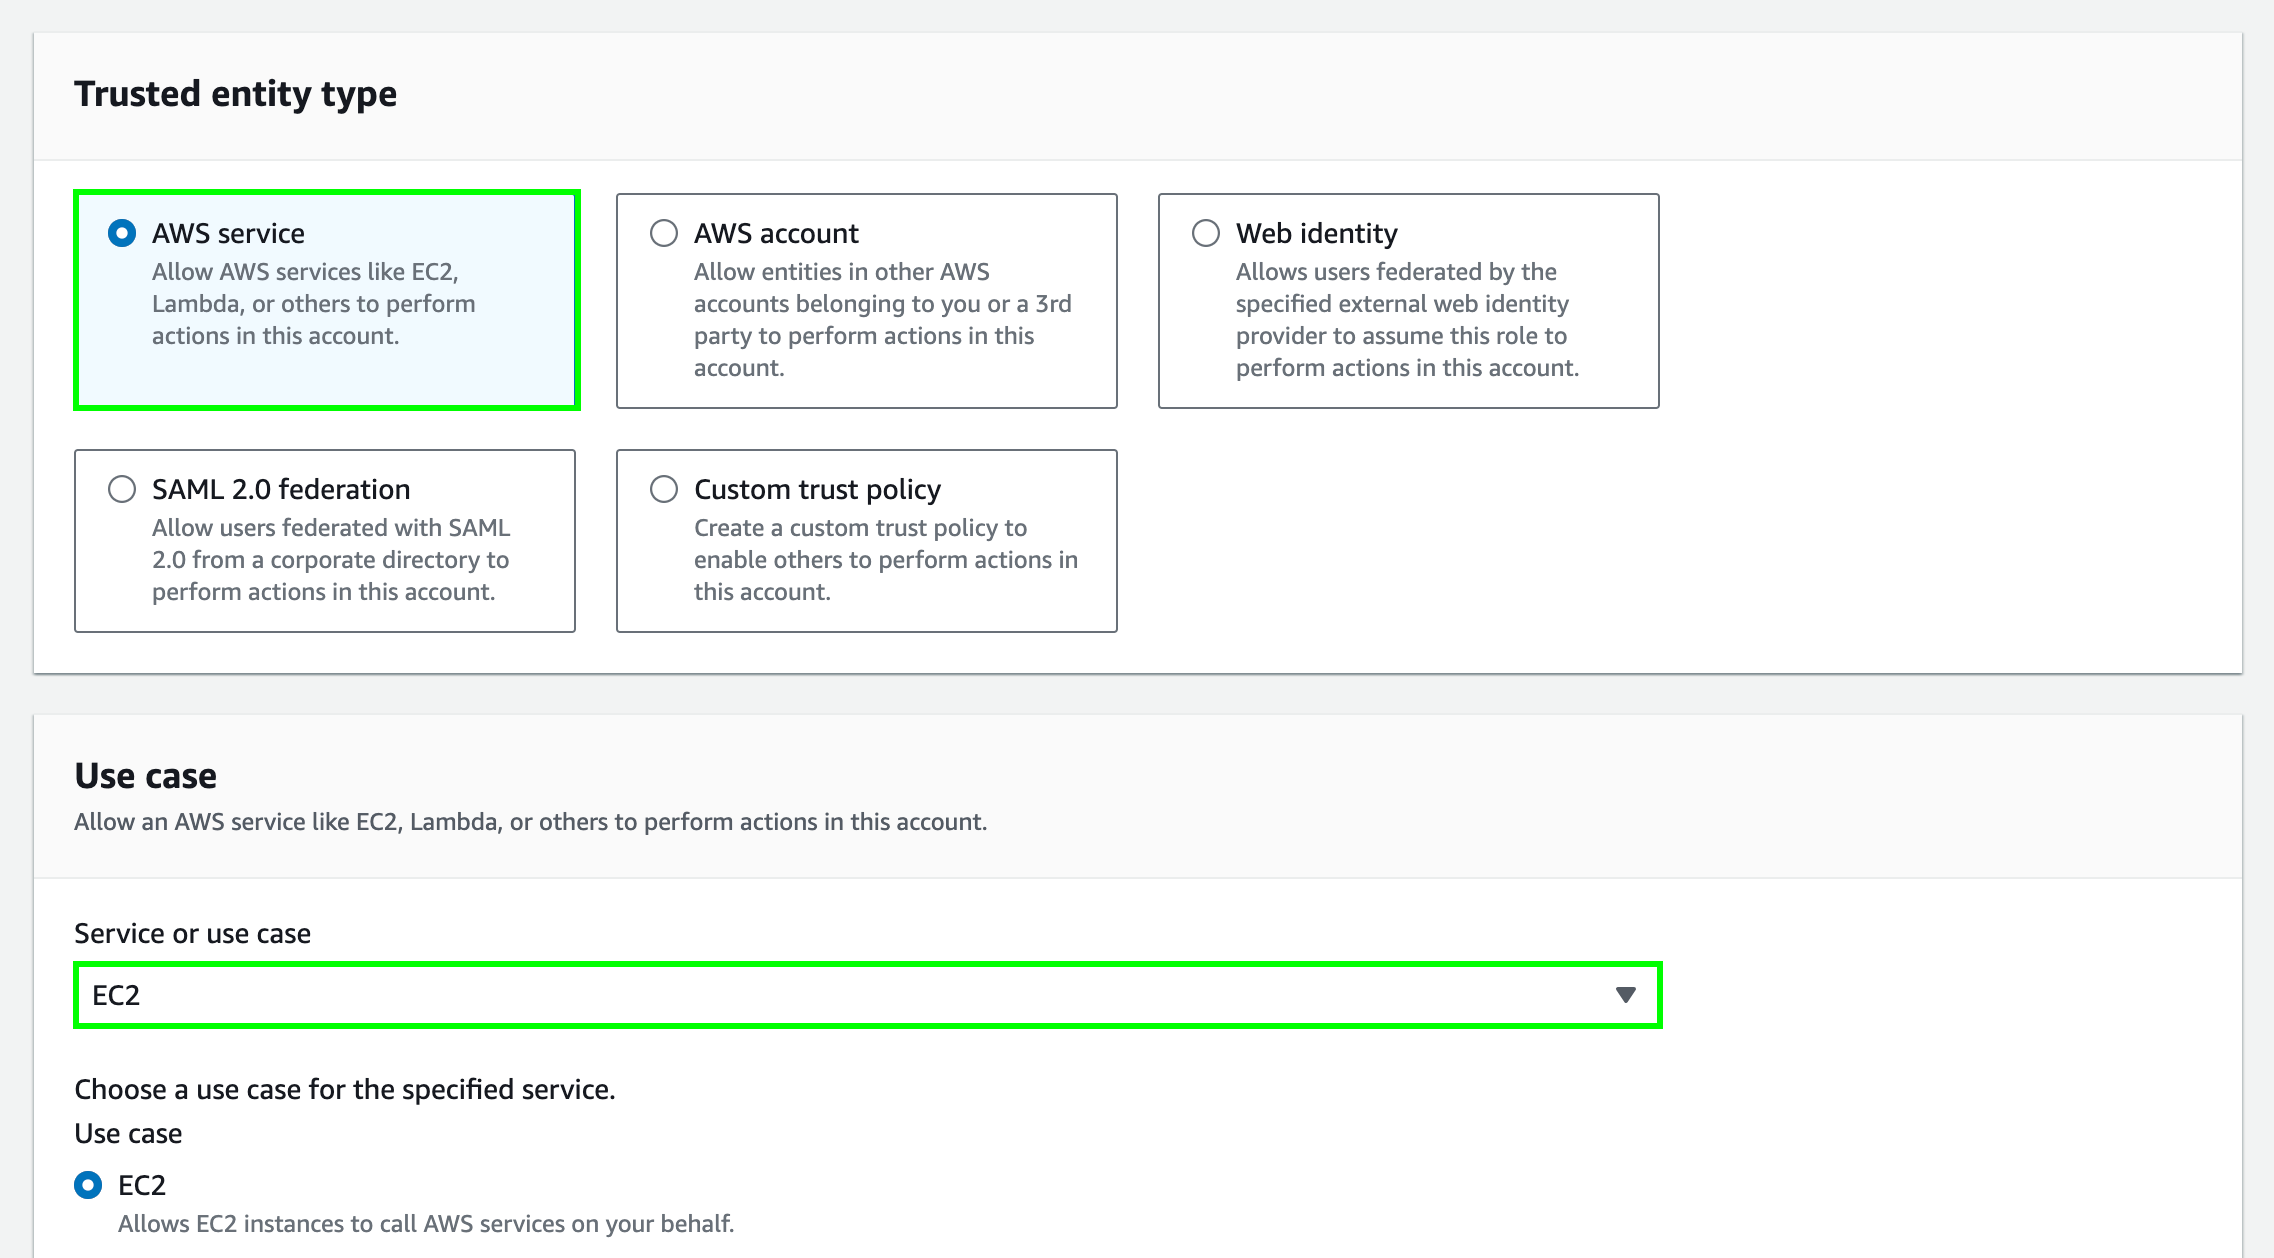
AWS serviceas the Trusted entity type and selectEC2as the Use case. Choose Next.
-
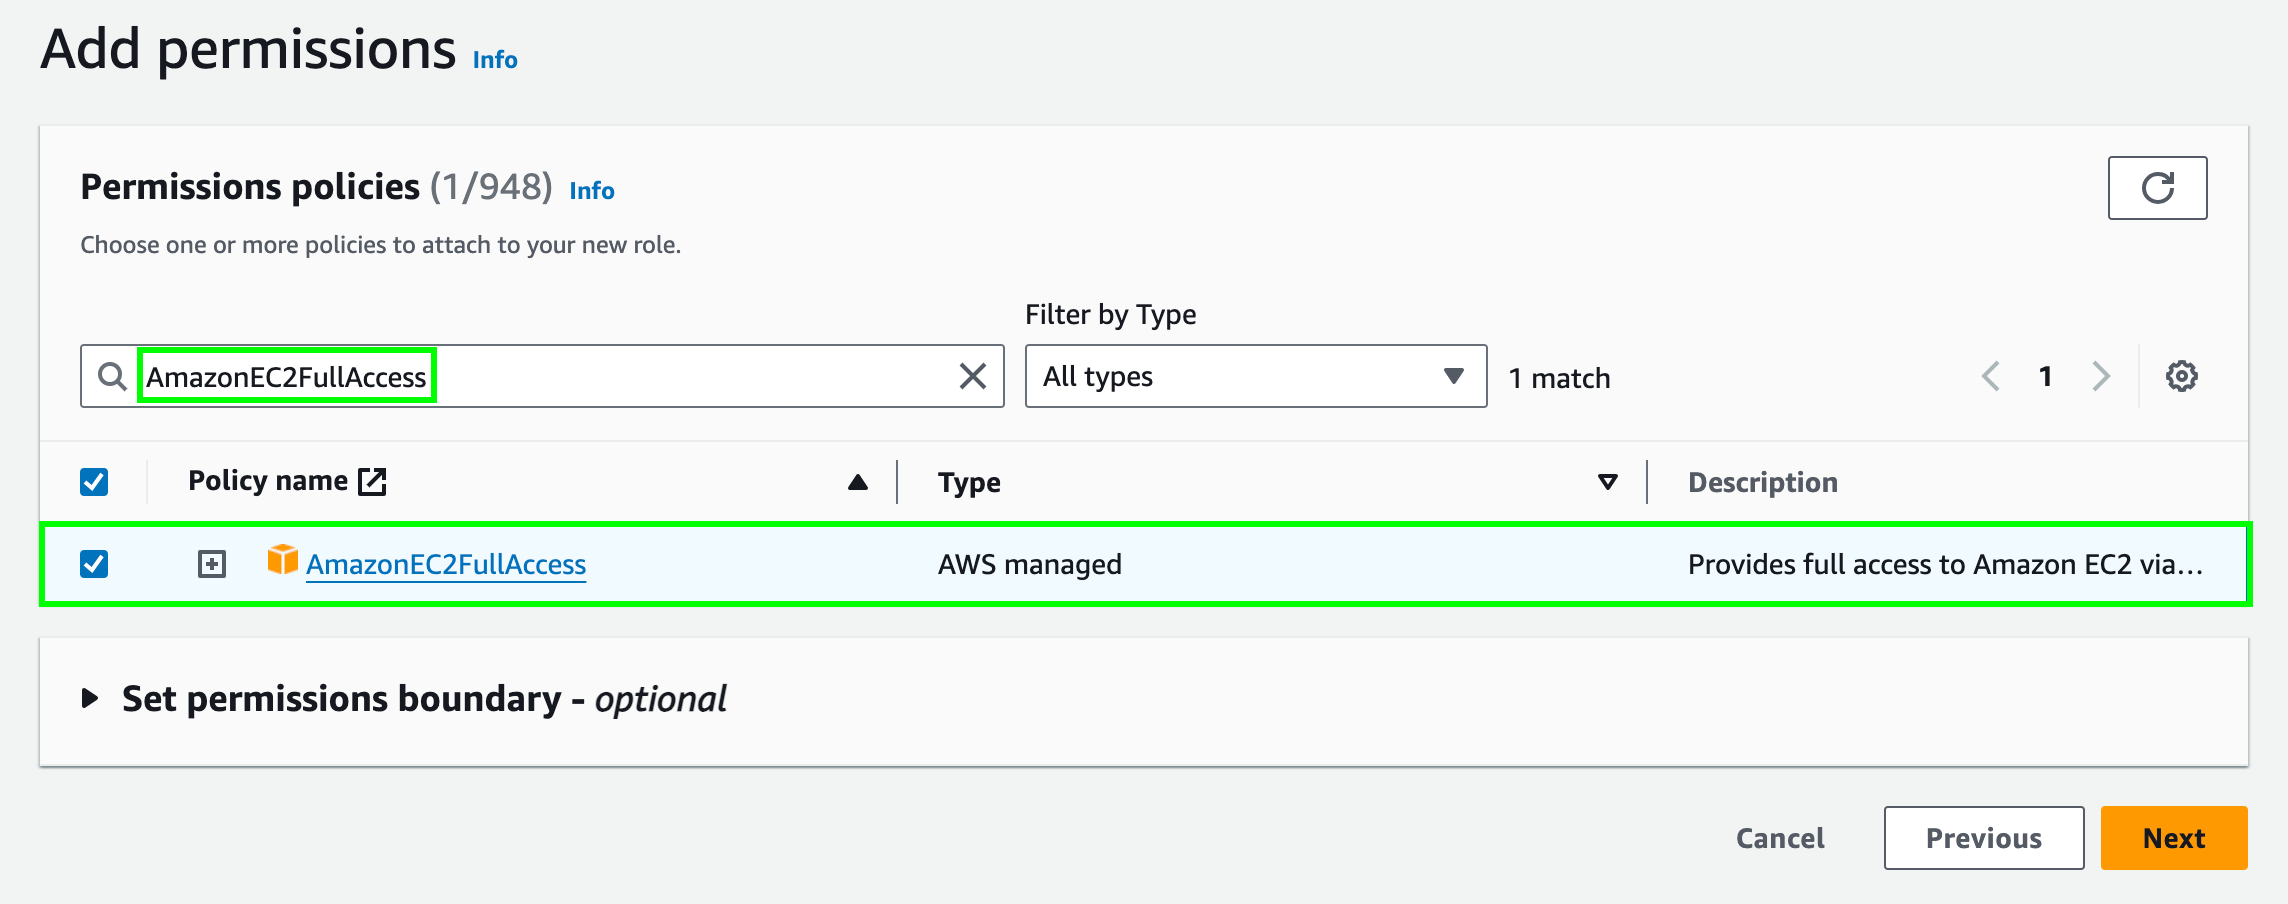
In the Add permissions page, search for and select
AmazonEC2FullAccess. And then choose Next.
Note that the
AmazonEC2FullAccesspolicy is used here for demonstration purposes. In a production environment, you should create a custom policy with the minimum required permissions. For example, you can create a custom policy with the following permissions:{ "Version": "2012-10-17", "Statement": [ { "Effect": "Allow", "Action": [ "ec2:ModifyInstanceAttribute", "ec2:ModifyNetworkInterfaceAttribute" ], "Resource": "*" } ] } -
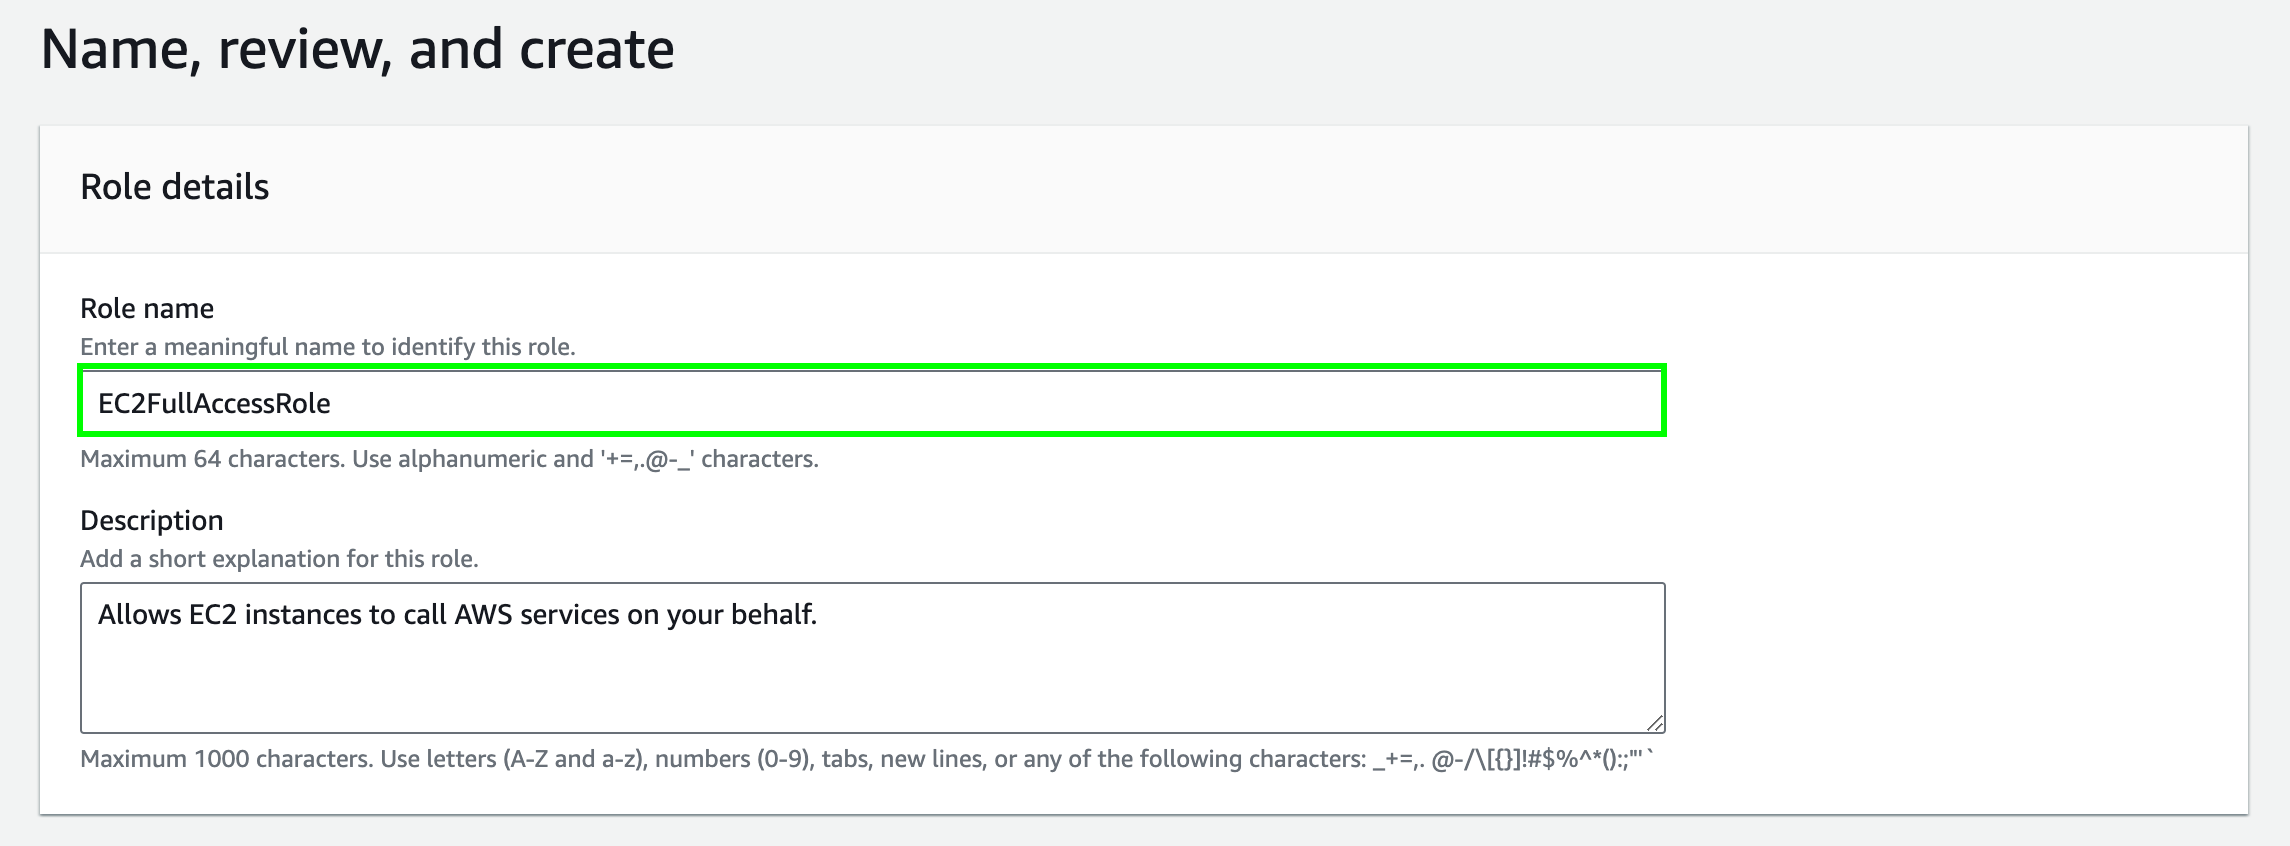
In the Review page, enter the Role name and choose Create role.
