Test the NAT instance
Create an EC2 Instance in the Private Subnet
Now that you have set up the NAT instance, we can test it by launching an EC2 instance in the private subnet and verifying that it can access the internet through the NAT instance.
-
Open the EC2 console (opens in a new tab).
-
In the sidebar, choose Instances.
-
Choose Launch instances.
-
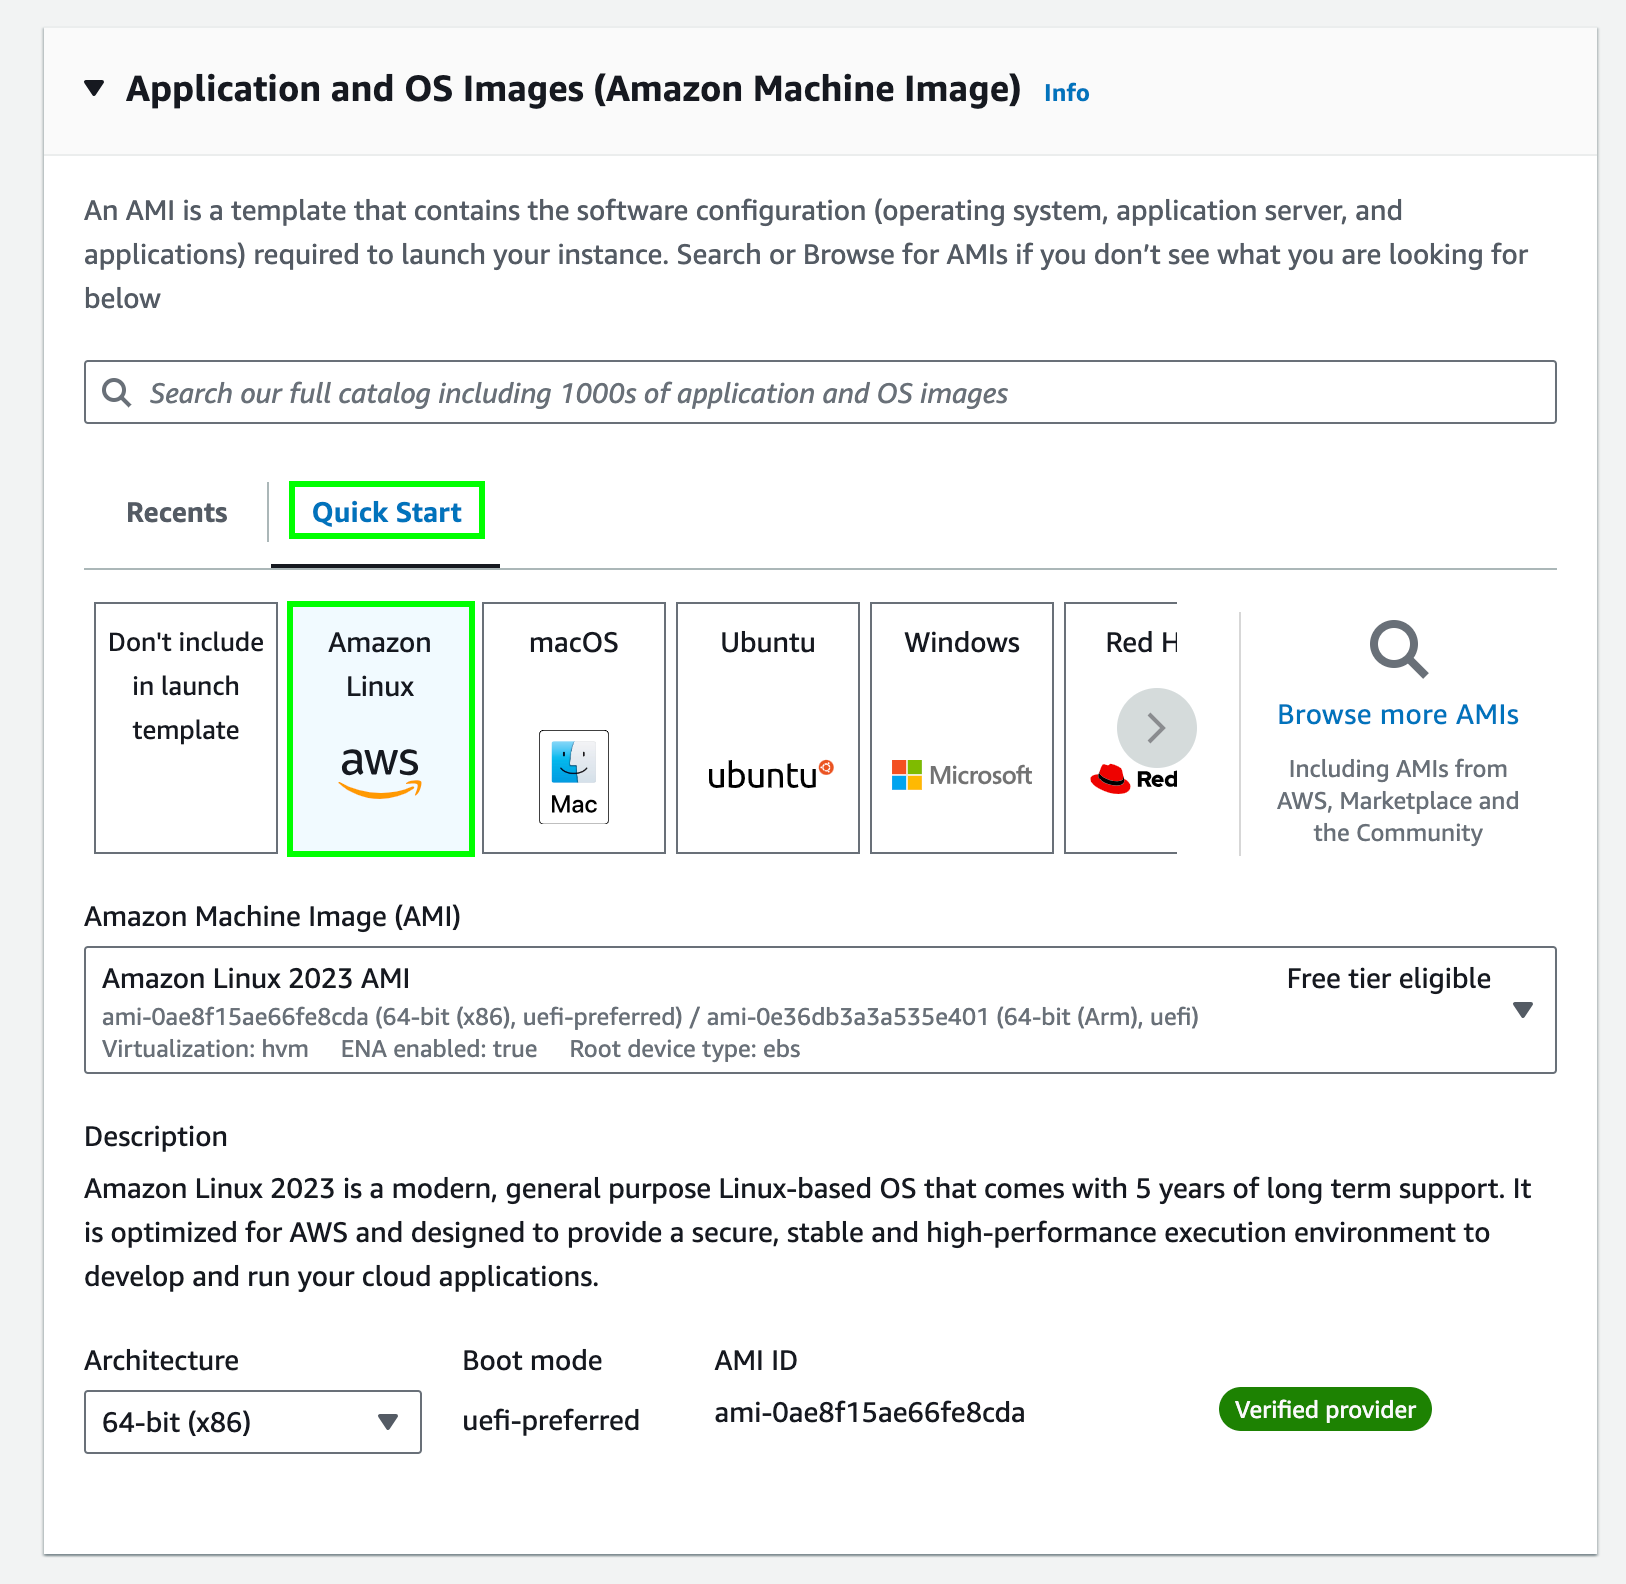
In the Amazon Machine Image (AMI), choose Quick Start and Amazon Linux 2023 AMI.

-
Choose
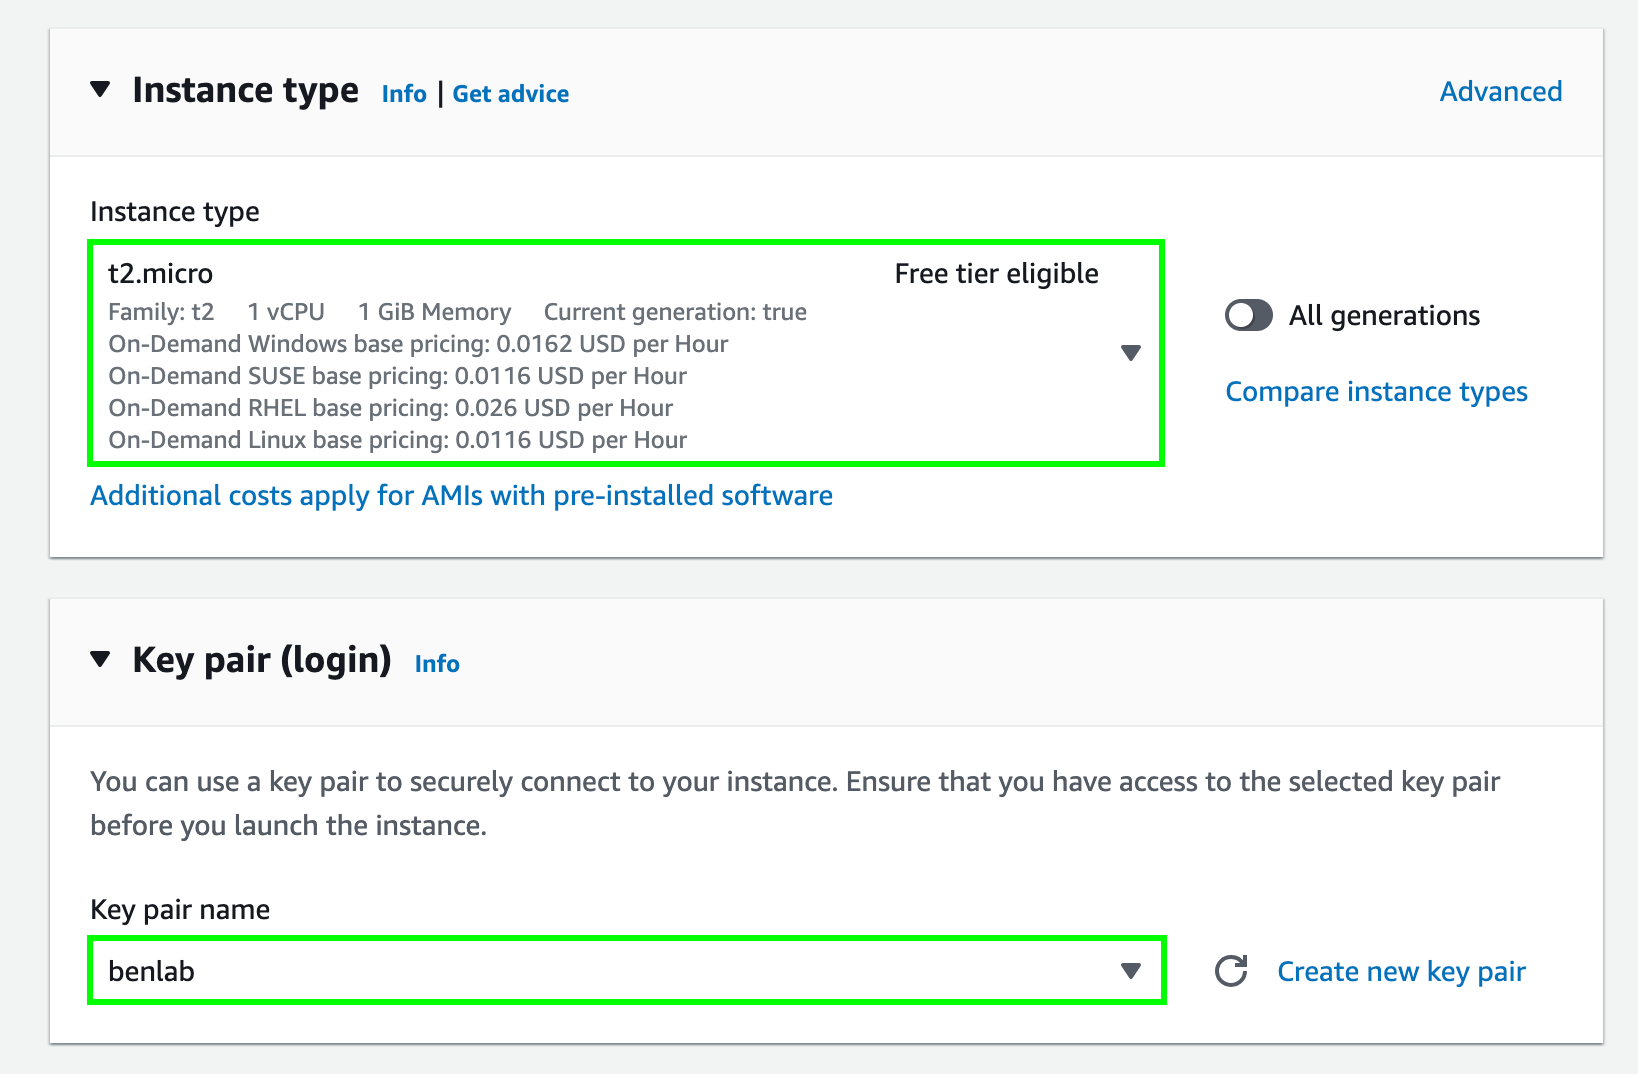
t2.microas the Instance type which is eligible for the AWS Free Tier (opens in a new tab). -
Choose Key pair for SSH access to the instance. We should use the same key pair as the NAT instance for SSH agent forwarding in the next step.

-
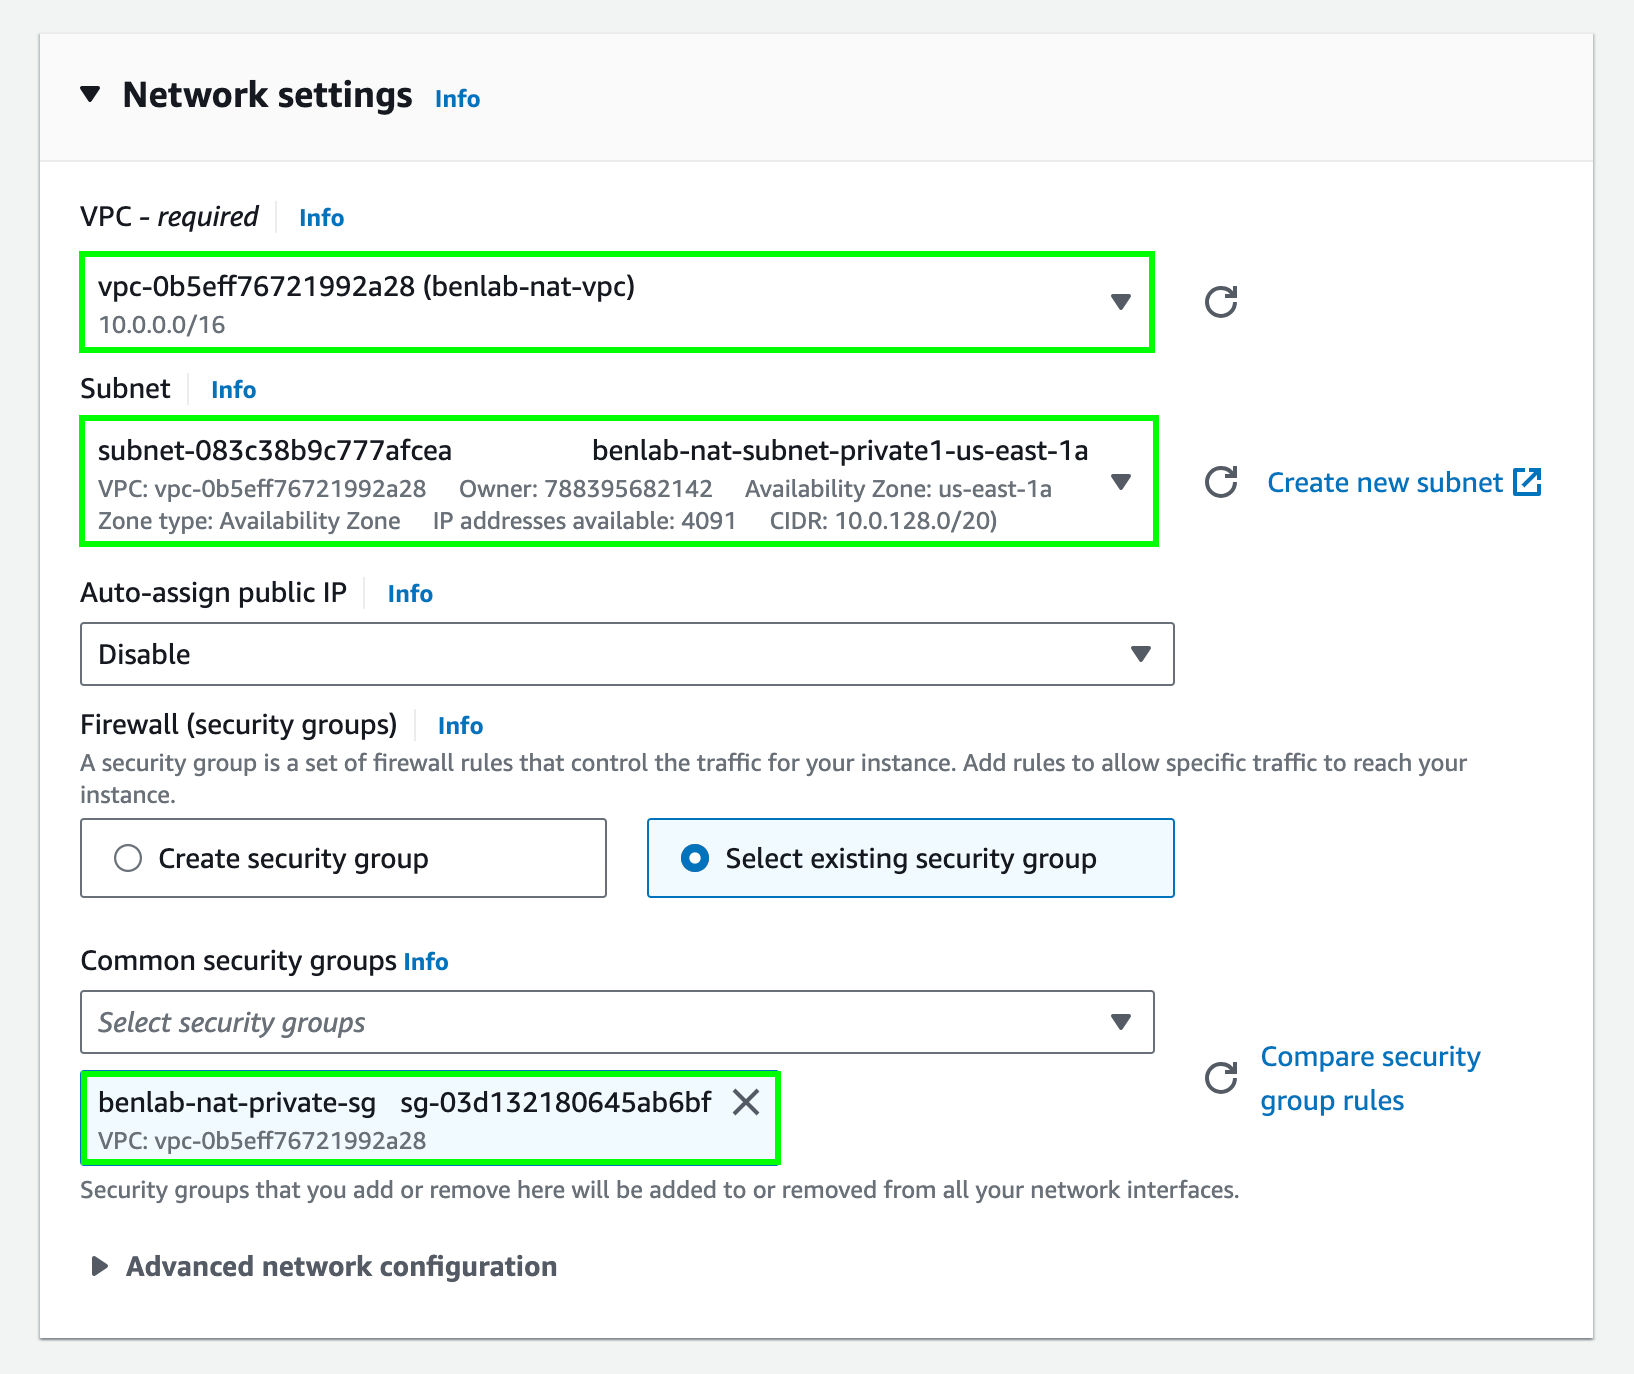
In the Network settings, select the VPC we created earlier and choose one of the private subnets. Then choose the security group you created earlier for the private instance.

-
Choose Launch instance.
SSH Agent Forwarding to NAT Instance
To test the NAT instance, we need to SSH into the private instance through the NAT instance. Instead of copying the private key to the NAT instance, which is not recommended for security reasons, we will use SSH agent forwarding.
-
Open a terminal on your local machine.
-
Run the following command to enable SSH agent forwarding:
ssh-add -K /path/to/your/private-key.pem
ssh -A ec2-user@<NAT-INSTANCE-PUBLIC-IP>
Replace
/path/to/your/private-key.pemwith the path to your private key and<NAT-INSTANCE-PUBLIC-IP>with the public IP address of the NAT instance which you can find in the EC2 console.In my case, the key is located at
~/.ssh/benlab.pemand the public IP address of the NAT instance is18.209.95.90. So, the command will be:ssh-add -K ~/.ssh/benlab.pem ssh -A ec2-user@18.209.95.90 -
Once you are connected to the NAT instance, you can SSH into the private instance using the private IP address:
ssh ec2-user@<PRIVATE-INSTANCE-PRIVATE-IP>Replace
<PRIVATE-INSTANCE-PRIVATE-IP>with the private IP address of the private instance which you can find in the EC2 console. In my case, the private IP address of the private instance is10.0.157.135. So, the command will be:ssh ec2-user@10.0.157.135 -
You should now be connected to the private instance through the NAT instance.
Test Internet Connectivity
Now that you are connected to the private instance, we will run some commands to test the internet connectivity.
-
Ping to google.com:
ping -c 4 google.comYou should see the ping responses from google.com.
-
Get the public IP address:
curl ipv4.icanhazip.comYou should see the public IP address of the NAT instance. This confirms that the private instance is using the NAT instance to access the internet.
Test the NAT Instance Recovery
Since the NAT instance is launched in the Auto-Scaling Group, it will be automatically recovered if the instance is terminated (intentionally or unintentionally). We will test this by terminating the NAT instance and verifying that a new NAT instance is launched in its place.
Terminate the NAT Instance
- Open the EC2 console (opens in a new tab).
- In the sidebar, choose Instances.
- Select the NAT instance.
- Choose Instance State > Terminate instance.
- Choose Terminate in the confirmation dialog.
Verify the Recovery
Now you can see that the NAT instance is terminated. And after a few minutes, a new NAT instance will be launched and configured automatically. You can verify this by checking the EC2 console.

You can SSH into the private instance again and test the internet connectivity, as we did earlier. It should work without any issues.